

- Home
-
-
How to Choose an Inverter for a Rooftop Solar System
Views: 0 Author: Site Editor Publish Time: 2026-08-04 Origin: Site
![facebook sharing button]()
![twitter sharing button]()
![line sharing button]()
![wechat sharing button]()
![linkedin sharing button]()
![pinterest sharing button]()
![whatsapp sharing button]()
![kakao sharing button]()
![snapchat sharing button]()
![sharethis sharing button]()
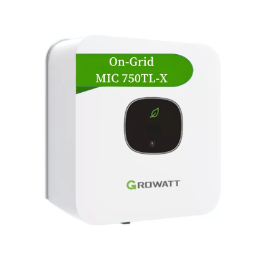
You are finalizing your rooftop photovoltaic system and face a critical decision. You must select the right brain to run the operation smoothly. Choosing this central hub determines how much energy your home actually receives. An undersized unit limits daily energy production heavily. Meanwhile, an oversized model wastes your upfront capital and operates poorly at lower loads. You need a perfect balance. Selecting the right rooftop photovoltaic inverter requires careful alignment of several factors. You must balance technical sizing rules against specific roof conditions. Shading profiles and panel layouts dictate your options immediately. Local grid compliance also plays a huge role in your final choice. Getting this formula right maximizes your long-term return on investment safely. We will explore exactly how to navigate capacity planning and hardware evaluations below.
Key Takeaways
Your inverter type (string, micro, or hybrid) must match your roof's shading profile and future battery plans.
A 1:1 panel-to-inverter ratio is rarely optimal; a DC/AC over-sizing ratio of 1.2 to 1.3 is an industry standard to maximize daily yield.
Warranties vary significantly by category—string inverters typically cover 10-12 years, while microinverters often cover 25 years.
Local grid limits and safety regulations (e.g., rapid shutdown) strictly dictate which inverters can be legally installed.
The Role of the Inverter in a Rooftop Photovoltaic System
Solar panels generate direct current (DC) electricity from sunlight. Your home appliances run on alternating current (AC). The inverter bridges this gap seamlessly. It converts raw DC power into usable AC energy. Without it, your solar panels are essentially useless glass. Beyond basic conversion, it synchronizes your system safely to the municipal utility grid.
The efficiency of this conversion process directly drives your return on investment. Modern units boast efficiency ratings between 95% and 98%. Higher efficiency means more generated power actually reaches your breaker box. A mere two percent drop wastes hundreds of kilowatt-hours annually. Therefore, efficiency dictates your tangible energy savings.
Keep in mind, these devices work incredibly hard. They manage high voltages and endure constant thermal stress daily. Because they handle such extreme electrical loads, they are usually the first component needing replacement. Most solar arrays outlast their original power conversion hubs easily. Active cooling fans push hot air away from sensitive electronics. Passive cooling relies entirely on heavy metal heat sinks. Either way, heat management defines the long-term reliability of the unit. This reality makes your upfront selection and thorough warranty evaluation absolutely critical. You want a product built to withstand years of brutal outdoor temperatures.

Categorizing the Solutions: Which Type Fits Your Roof?
A standard grid-connected inverter often comes in the form of a string architecture. String models connect a series of solar panels together. They send the combined DC power down to a single centralized unit. They are best for simple, unshaded pitched roofs facing one single direction. They remain the most cost-effective option available today. Maintenance is exceptionally easy because the centralized unit mounts on a ground-level garage wall. Technicians rarely need a ladder. However, they suffer from a major operational drawback. If one panel falls under heavy shade, the entire string's output drops drastically. Think of it like a kink in a garden hose.
Microinverters mount directly underneath each individual solar panel. They convert DC to AC right there on the roof. They are best for complex roofs facing multiple directions. They also excel in heavy shade environments. You gain true panel-level optimization and detailed performance monitoring. If a chimney shades one panel, the others continue pumping out maximum power independently. Conversely, they carry a noticeably higher upfront price tag. Maintenance becomes complex since technicians must climb onto the roof to replace faulty units. You add dozens of potential failure points across the array.
Hybrid models handle both solar panels and battery storage systems simultaneously. They are best for homeowners planning to add batteries immediately or soon. They eliminate the need to buy a separate battery control unit later. This simplifies your entire home energy setup beautifully. You will pay a distinct price premium upfront for this capability. If you never actually install batteries, you waste that extra investment entirely.
Sizing Strategy: Navigating Capacity and "Inverter Clipping"
Many buyers assume a 10kW panel array needs a 10kW capacity device. This exact 1:1 ratio is a common industry myth. In professional solar design, a 1.2 to 1.3 sizing ratio represents best practice. For example, pairing 10kW of panels with an 8kW device works beautifully. Why do engineers recommend this? Solar panels rarely produce their absolute maximum laboratory-rated output in reality.
This strategic sizing introduces a concept called inverter clipping. Clipping happens when panels produce more DC power than the AC capacity allows. The unit essentially caps or "clips" the peak energy during midday sunshine. While you lose some peak-hour energy, you gain a massive advantage elsewhere. The smaller unit operates much more efficiently at lower loads. It wakes up earlier in the morning. It stays on later into the evening. This broader operating window typically yields higher net annual energy production. Design software models these clipping losses precisely. Engineers accept a two percent annual clipping loss to gain five percent better performance during morning hours. It represents a calculated, mathematical trade-off. The math heavily favors the over-sizing approach.
Environmental adjustments also justify this strategy firmly. Geographic location heavily impacts daily sunshine intensity. Panel degradation reduces maximum output gradually over a twenty-year span. Roof dynamics matter significantly too. Flat roofs experience different thermal buildups compared to steeply pitched designs. Higher heat lowers panel voltage output measurably. You must factor these real-world thermal losses into your design. Over-sizing your array ensures the system hits optimal capacity more frequently despite harsh weather.
Evaluating a Household Photovoltaic Inverter: Key Dimensions
When evaluating a household photovoltaic inverter, you must look beyond basic marketing claims. Evaluating hardware requires a critical eye.
First, examine the efficiency metrics carefully. Manufacturers love to advertise "Peak Efficiency" prominently on their brochures. This number reflects a perfect, theoretical laboratory condition. Instead, you should demand the "CEC Efficiency" or "Euro Efficiency" ratings. These weighted metrics reflect real-world performance across varied loads. They give you a much more accurate expectation of daily operation.
Next, compare warranty and post-sale support terms. The standard baseline for string models sits between 10 and 12 years. Microinverters often offer extensive 25-year warranties out of the box. Always read the fine print closely. Check if the warranty covers actual replacement labor. Many warranties only cover the hardware itself, leaving you facing hefty labor bills later.
Software and monitoring ecosystems also demand your attention. A clunky, unresponsive app ruins the user experience quickly. Does the mobile app provide clear panel-level visibility? Can it integrate smoothly into your existing smart home setup? Good software helps you spot performance drops immediately. Advanced users appreciate open API access. This feature lets you pull raw data into customized smart home dashboards. It empowers you to track daily generation trends effortlessly.
Finally, prioritize overall brand viability. You want a manufacturer boasting proven operational longevity. Point to established benchmarks like a Growatt inverter, SMA, or Enphase. These companies offer robust local support infrastructure. Institutional stability ensures they remain active when you need a warranty claim years down the line. Avoid unproven startup brands lacking local service centers.
The chart below illustrates how different hardware categories stack up across essential evaluation metrics.
Hardware Category
Ideal Roof Profile
Standard Warranty Term
Relative Upfront Cost
String
Unshaded, Single Pitch
10 - 12 Years
Low
Microinverter
Complex, Heavy Shade
Up to 25 Years
High
Hybrid
Battery-Ready Homes
10 - 15 Years
Medium - High
Compliance, Safety, and Implementation Risks
Your local utility company holds significant power over your project. Grid regulations often impose hard limits on installation sizes. Many utilities enforce strict export limits on residential neighborhoods. These rules restrict the maximum allowable AC capacity you can connect. You must verify these limits before purchasing any equipment. Ignoring them leads to failed inspections and denied grid access.
Safety standards present another non-negotiable hurdle. In regions following standard safety codes, rapid shutdown compliance is strictly mandatory. This rule ensures firefighters can de-energize the roof instantly during fire emergencies. Anti-islanding protection is equally critical. If the neighborhood grid goes dark, your system must shut off immediately. This mechanism protects utility workers from unexpected voltage while repairing downed power lines.
Installation realities also dictate your final hardware choice. Consider the physical clearance requirements for adequate ambient cooling. Outdoor installations require robust weather ratings, such as NEMA 4X or IP65 certifications. Noise levels matter heavily too. Fan-cooled units generate noticeable humming sounds under heavy midday loads. Passively cooled models run silently but demand optimal airflow. Place outdoor units carefully away from bedroom windows to avoid irritating noise disturbances.
Shortlisting Logic: Next Steps for Your Project
Follow these logical steps to finalize your hardware selection systematically.
Step 1: Baseline the Load. Confirm your target array size with your certified installer. Base this figure on your historical monthly energy bills. A proper sizing strategy prevents expensive overbuilding.
Step 2: Assess the Roof. Check shading profiles carefully. Use satellite imagery or drone design tools to map physical obstacles. This dictates your choice between centralized string models and distributed microinverters.
Step 3: Future-Proofing. Decide on your 3-to-5-year battery storage plans right now. This decision locks in or firmly rules out a hybrid setup. Planning ahead prevents costly hardware replacements later.
Step 4: Spec Review. Request the specific datasheet from your chosen installer. Verify the CEC efficiency, warranty terms, and DC/AC sizing ratio before signing any contracts. Ensure the noise ratings fit your proposed installation location.
Conclusion
Your selected device serves as the operational bottleneck of your entire solar project. A poorly chosen unit drags down the performance of premium panels. Therefore, you must prioritize verifiable performance metrics over flashy nameplate ratings. Focus intensely on CEC efficiency scores. Demand clear, comprehensive formal warranty terms. Value installer expertise above aggressive marketing claims.
Take these concrete steps moving forward:
Gather your past twelve months of utility bills to establish an accurate baseline.
Identify potential shading threats like growing trees or neighboring chimneys.
Consult a certified solar installer armed with your specific roof constraints.
Verify local utility grid limitations regarding maximum allowable export capacity.
Working closely with seasoned professionals ensures your final design meets strict grid requirements effortlessly. It guarantees you extract maximum value from every ray of sunshine hitting your roof.
FAQ
Q: What happens if my solar inverter is too small?
A: When undersized, it heavily clips peak midday energy production. While a slight 1.2 to 1.3 DC/AC ratio is mathematically optimal for daily yield, extreme undersizing wastes massive amounts of potential power. It forces the device to run at maximum thermal capacity constantly, degrading internal components faster.
Q: What happens if my inverter is too large?
A: Oversizing wastes your upfront capital on capacity you cannot use. Large units require a higher minimum voltage to wake up and start converting power. They operate poorly and inefficiently at low power loads, meaning you lose valuable energy during early mornings and late afternoons.
Q: Can I upgrade my grid-connected inverter later if I add more panels?
A: Standard string units have strict voltage limits. Adding more panels often exceeds these string sizes. You typically cannot simply plug more panels into a maxed-out unit. You must either install a second dedicated unit, replace the existing one entirely, or utilize microinverters for the expansion.
Q: How long should a standard inverter last?
A: Realistic lifespan expectations depend heavily on the technology type. Standard string models generally last between 10 and 15 years before needing replacement. In contrast, premium microinverters often operate reliably for up to 25 years, aligning closer to the lifespan of the solar panels themselves.


