- Home
-
-
What Determines Rooftop Solar System Cost?
Views: 0 Author: Site Editor Publish Time: 2026-07-28 Origin: Site
![facebook sharing button]()
![twitter sharing button]()
![line sharing button]()
![wechat sharing button]()
![linkedin sharing button]()
![pinterest sharing button]()
![whatsapp sharing button]()
![kakao sharing button]()
![snapchat sharing button]()
![sharethis sharing button]()
Many property owners hit a frustrating wall during the final stages of going solar. You request three estimates, and you receive drastically different quotes for seemingly identical setups. A rooftop photovoltaic system lacks a single, universal sticker price. Instead, costs represent a complex composite of chosen hardware, unique site realities, and regional compliance mandates. Understanding these specific layers is crucial. You want to avoid overpaying for unnecessary add-ons or underpaying for subpar equipment that fails prematurely. We establish an evidence-based approach here. The primary goal involves evaluating long-term value and yield, not just hunting for the lowest upfront cost. In this guide, you will learn exactly how to deconstruct hardware expenses. You will discover how to identify hidden site-specific fees. Finally, we provide a reliable framework to objectively compare installer proposals.
Key Takeaways
System costs are divided into hard costs (equipment) and soft costs (labor, permitting, and grid interconnection).
High-efficiency solar modules and advanced energy storage systems increase initial CAPEX but can optimize long-term LCOE (Levelized Cost of Energy).
Hidden variables—such as roof condition, electrical panel upgrades, and local compliance hurdles—account for the majority of quote discrepancies.
Evaluating quotes requires benchmarking the "price per watt" (PPW) while weighing the installer's warranty and implementation expertise.
Hard Costs: Breaking Down Your Rooftop Photovoltaic System
We must first deconstruct the tangible equipment. These physical components make up the bulk of your upfront investment. Understanding them helps you see exactly where your money goes. Hardware choices dictate both your immediate budget and your future energy production.
Solar Modules: Efficiency vs. CAPEX
Panel choice drives a significant portion of your budget. You typically choose between monocrystalline and polycrystalline options. Monocrystalline panels feature higher efficiency rates. They often exceed 21% efficiency. They offer a sleek, black appearance but cost more upfront. Polycrystalline alternatives are cheaper to manufacture. However, they boast lower efficiency. You need more roof space to generate the same power.
You will pay a premium for tier-one solar modules. This investment often makes excellent financial sense. Tier-one panels suffer lower annual degradation rates. They usually degrade around 0.5% per year compared to 0.8% for lower-tier options. They maintain higher wattage output over their 25-year lifespan. This long-term durability easily justifies the initial capital expenditure (CAPEX).
The Photovoltaic Inverter: String, Micro, or Optimizer?
Your choice of photovoltaic inverter dictates overall system efficiency. This becomes especially clear in partially shaded environments. You have three main technology options to consider.
Central string inverters offer a lower upfront cost. Installers connect all panels to a single unit. However, if a chimney casts shade on one panel, the entire string's electrical output drops. Microinverters solve this problem. They attach to each individual panel. They cost significantly more but provide superior localized performance. Power optimizers offer a hybrid middle ground. They optimize per-panel output on the roof while sending the power to a central unit on your wall.
Inverter Technology
Upfront Cost Impact
Shade Tolerance
Typical Warranty Period
Central String Inverter
Low
Poor
10 to 12 Years
Power Optimizers
Medium
Excellent
12 to 25 Years
Microinverters
High
Excellent
25 Years
The Photovoltaic Bracket and Racking Infrastructure
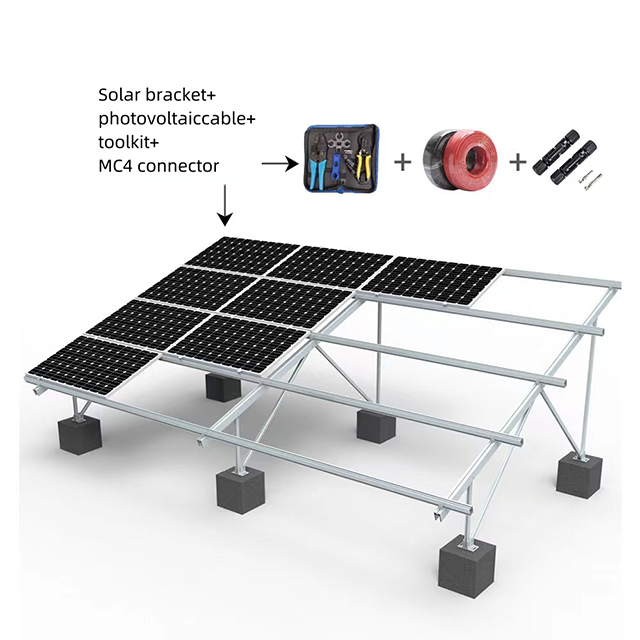
Your roof material directly dictates the type of photovoltaic bracket required. Installers mount arrays on composite shingles using standard penetration mounts. These mounts include aluminum flashings to prevent leaks. They remain highly cost-effective. Metal, Spanish tile, or flat membrane roofs demand specialized racking. These custom attachments increase hardware costs. They require careful, time-consuming waterproofing techniques.
Structural compliance also plays a huge role in pricing. Mounting systems must meet local building codes. Jurisdictions with high wind zones or heavy snow loads require heavy-duty rails. Installers must use closer attachment spacing. Upgrading to a reinforced mounting system costs more. However, it prevents catastrophic structural failures during extreme weather events.
Energy Storage Integration (Optional but Impactful)
Adding energy storage changes your financial math entirely. Batteries provide crucial backup power during grid outages. They also offer peak-shaving capabilities if your utility uses time-of-use rates. However, they significantly increase initial project costs.
You must choose between AC-coupled and DC-coupled storage systems. DC-coupled systems route power directly from the panels to the battery. They are highly efficient for brand new installations. AC-coupled systems work better if you want to retrofit batteries to an existing array. Each configuration carries a different installation premium based on the necessary sub-panels and transfer switches. Modern lithium iron phosphate chemistry offers longer lifespans, justifying the steep initial price tag.
![Rooftop solar system installation process and components]()
Site-Specific Variables: Why Identical Homes Get Different Quotes
Implementation realities and physical constraints alter baseline pricing. Two identical houses can receive vastly different quotes based on minor site variations. An accurate site audit reveals these hidden factors.
Roof Pitch, Azimuth, and Condition
Installers factor your roof pitch into their labor estimates. Steep roofs create dangerous working conditions. Crews require advanced fall protection gear and extra safety rigging. This slows down the installation process. It increases labor fees considerably.
Azimuth, or roof orientation, also matters immensely. Panels facing true south capture the most sunlight in the northern hemisphere. If your roof faces east or west, panels generate less power. You will need more panels to achieve your desired energy offset. Furthermore, if your roof shows signs of severe wear, you must fix it first. Removing a solar array later to replace aging shingles is an expensive nightmare.
Electrical Infrastructure Upgrades
Older properties often hide a major expense. You might need to upgrade your main breaker panel. Upgrading from a 100A panel to a 200A panel allows the electrical system to safely handle solar backfeed. The National Electrical Code requires strict compliance for these grid connections. This necessary electrical upgrade can add thousands of dollars to your final bill. Installers usually discover this requirement during the initial site assessment.
Trenching and Conduit Runs
Moving electricity from the roof to the main service panel costs money. Standard surface-mounted conduit running down the side of your house is the cheapest option. However, homeowners often prefer hidden, aesthetic conduit runs inside the walls or attic. These complex routes take hours to fish through tight spaces. Ground-mounted systems require extensive underground trenching to meet depth codes. These custom wiring solutions introduce variable labor and material costs.
The Impact of Soft Costs: Labor, Permitting, and Compliance
Non-hardware expenses make up a surprisingly large percentage of your total bill. Industry experts call these soft costs. They include labor, administrative fees, marketing overhead, and supply chain logistics.
Labor and Installer Expertise
You will see price differences based on who actually performs the work. Some companies utilize cut-rate subcontractors to lower their bids. Others employ certified, in-house master electricians and seasoned roofers.
Cheaper labor often introduces significant adoption risks. Poor workmanship leads to devastating roof leaks, faulty wiring, and failed inspections. Paying a premium for an experienced, certified installer protects your property. It ensures the hardware operates safely for decades. We recommend thoroughly checking installer credentials before signing any contracts.
Permitting and Interconnection
Local governments and utility companies charge various administrative fees. You must pay municipal permitting fees before any construction begins. Complex roof designs might require costly structural engineering stamps. Once crews finish the installation, your utility company may charge interconnection fees. These fees cover the cost of linking your new system to the public grid. These mandatory compliance costs vary wildly by municipality and utility provider.
Supply Chain and Sourcing
Global logistics affect local pricing more than most buyers realize. Regional hardware availability influences what local installers quote. Import tariffs on imported panels or batteries can suddenly spike wholesale costs. Installers inevitably pass these supply chain fluctuations down to the consumer. Choosing domestically produced equipment might reduce shipping delays but could carry a higher base price.
A Decision-Stage Framework for Evaluating Solar Quotes
You need a skeptical, structured method for comparing short-listed vendors. Do not simply look at the bottom-line price. Break down the proposals methodically to uncover the true value.
Benchmarking Price Per Watt (PPW)
Calculate the Price Per Watt to create a fair, apples-to-apples comparison metric. Take the gross cost of the system before tax incentives. Divide it by the total system wattage.
Follow these steps to analyze PPW:
Identify the total gross cost (e.g., $24,000).
Calculate the total wattage by multiplying the number of panels by the wattage per panel (e.g., 20 panels x 400W = 8,000W).
Divide the cost by the wattage ($24,000 / 8,000W = $3.00 PPW).
This metric exposes overpriced quotes, regardless of the overall system size. It helps you identify which installer offers the most efficient hardware for the best price.
Warranty Analysis
Always split your warranty analysis into two distinct categories. Equipment warranties come from the manufacturer. They guarantee the panels and inverters will perform up to standard for 10 to 25 years. Workmanship warranties come directly from the installer. They cover physical installation defects like roof leaks and loose wiring. Workmanship warranties usually last between 5 and 10 years. A suspicious, cheap quote often hides a terrible workmanship warranty.
Financing Implications
How you pay radically alters the lifetime cost of the system. We can break this down into three standard paths:
Cash Purchases: You pay the lowest total price. This path maximizes your long-term financial savings and secures instant home equity.
Solar Loans: These loans often include hidden dealer fees. A heavily advertised low-APR loan might actually inflate the system's principal cost by 20% or more.
Power Purchase Agreements (PPAs): Under a PPA, you buy the generated power, not the hardware. Upfront costs drop to zero, but your total lifetime savings remain minimal.
Balancing Initial System Cost Against Long-Term ROI
We must shift focus from Day-1 costs to lifecycle performance. A cheap system often becomes highly expensive over time due to frequent repairs and substandard energy output.
LCOE (Levelized Cost of Energy)
The Levelized Cost of Energy measures the lifetime cost of the system divided by the total energy it produces. This metric reveals the true financial impact of your hardware choices. Paying a 15% upfront premium for top-tier hardware might seem steep today. However, premium equipment often yields 25% more energy over a 25-year span. This higher, reliable yield lowers your overall LCOE. It makes the more expensive system a vastly better financial decision in the long run.
Maintenance Baselines
Set realistic maintenance expectations from the beginning. Panels rarely break, but active electronics like string inverters do fail. You should plan for a mandatory inverter replacement around year 10 or 15. You should also budget for routine inspection costs and occasional panel cleaning. Factoring these predictable baselines into your ROI calculations prevents unpleasant financial surprises down the road.
Conclusion
The true cost of a rooftop solar system involves multiple complex layers. It remains a calculated blend of hardware quality, site readiness, and installer competence. You must successfully navigate physical constraints alongside local compliance mandates. We strongly advise buyers to dismiss extreme outlier quotes. Suspiciously low bids often indicate dangerous corner-cutting. Exorbitantly high bids exploit uneducated buyers. Focus instead on transparent, line-item estimates that explain every charge. Request a professional site audit today. Utilize a detailed cost-calculator to secure a customized, reliable baseline estimate for your specific property.
FAQ
Q: What is a good Price Per Watt (PPW) for a residential solar system?
A: A competitive Price Per Watt typically ranges between $2.70 and $3.50 in the US market before incentives. This figure varies significantly based on regional labor rates, local permitting costs, and equipment quality. Always calculate PPW to compare proposals objectively.
Q: Do I need to replace my roof before installing a rooftop photovoltaic system?
A: If your roof is more than 10 to 15 years old, you should replace it first. Removing and reinstalling panels later to fix a failing roof costs thousands of dollars in labor. Ensure your roof outlasts your new 25-year solar array.
Q: Are dealer fees included in solar loans?
A: Yes. Many low-APR solar loans hide massive dealer fees. These fees can inflate the principal cost of your system by 15% to 30%. Always ask for the cash price versus the financed price to expose hidden lending markups.
Q: How much does adding energy storage increase the total cost?
A: Adding a typical residential battery system increases the total cost by $10,000 to $18,000. The exact price depends on battery capacity and whether you choose an AC-coupled or DC-coupled configuration. While expensive, batteries offer essential grid independence and blackout protection.